Installation Instructions for 6-Battery Ikea Duktig Stoves
Installation is a snap! I designed the board to be virtually identical to the original: it has the same physical dimensions, the same connectors, and mounting holes in the same places. All you have to do is disconnect the wires from the old board and plug them into the new one.
|
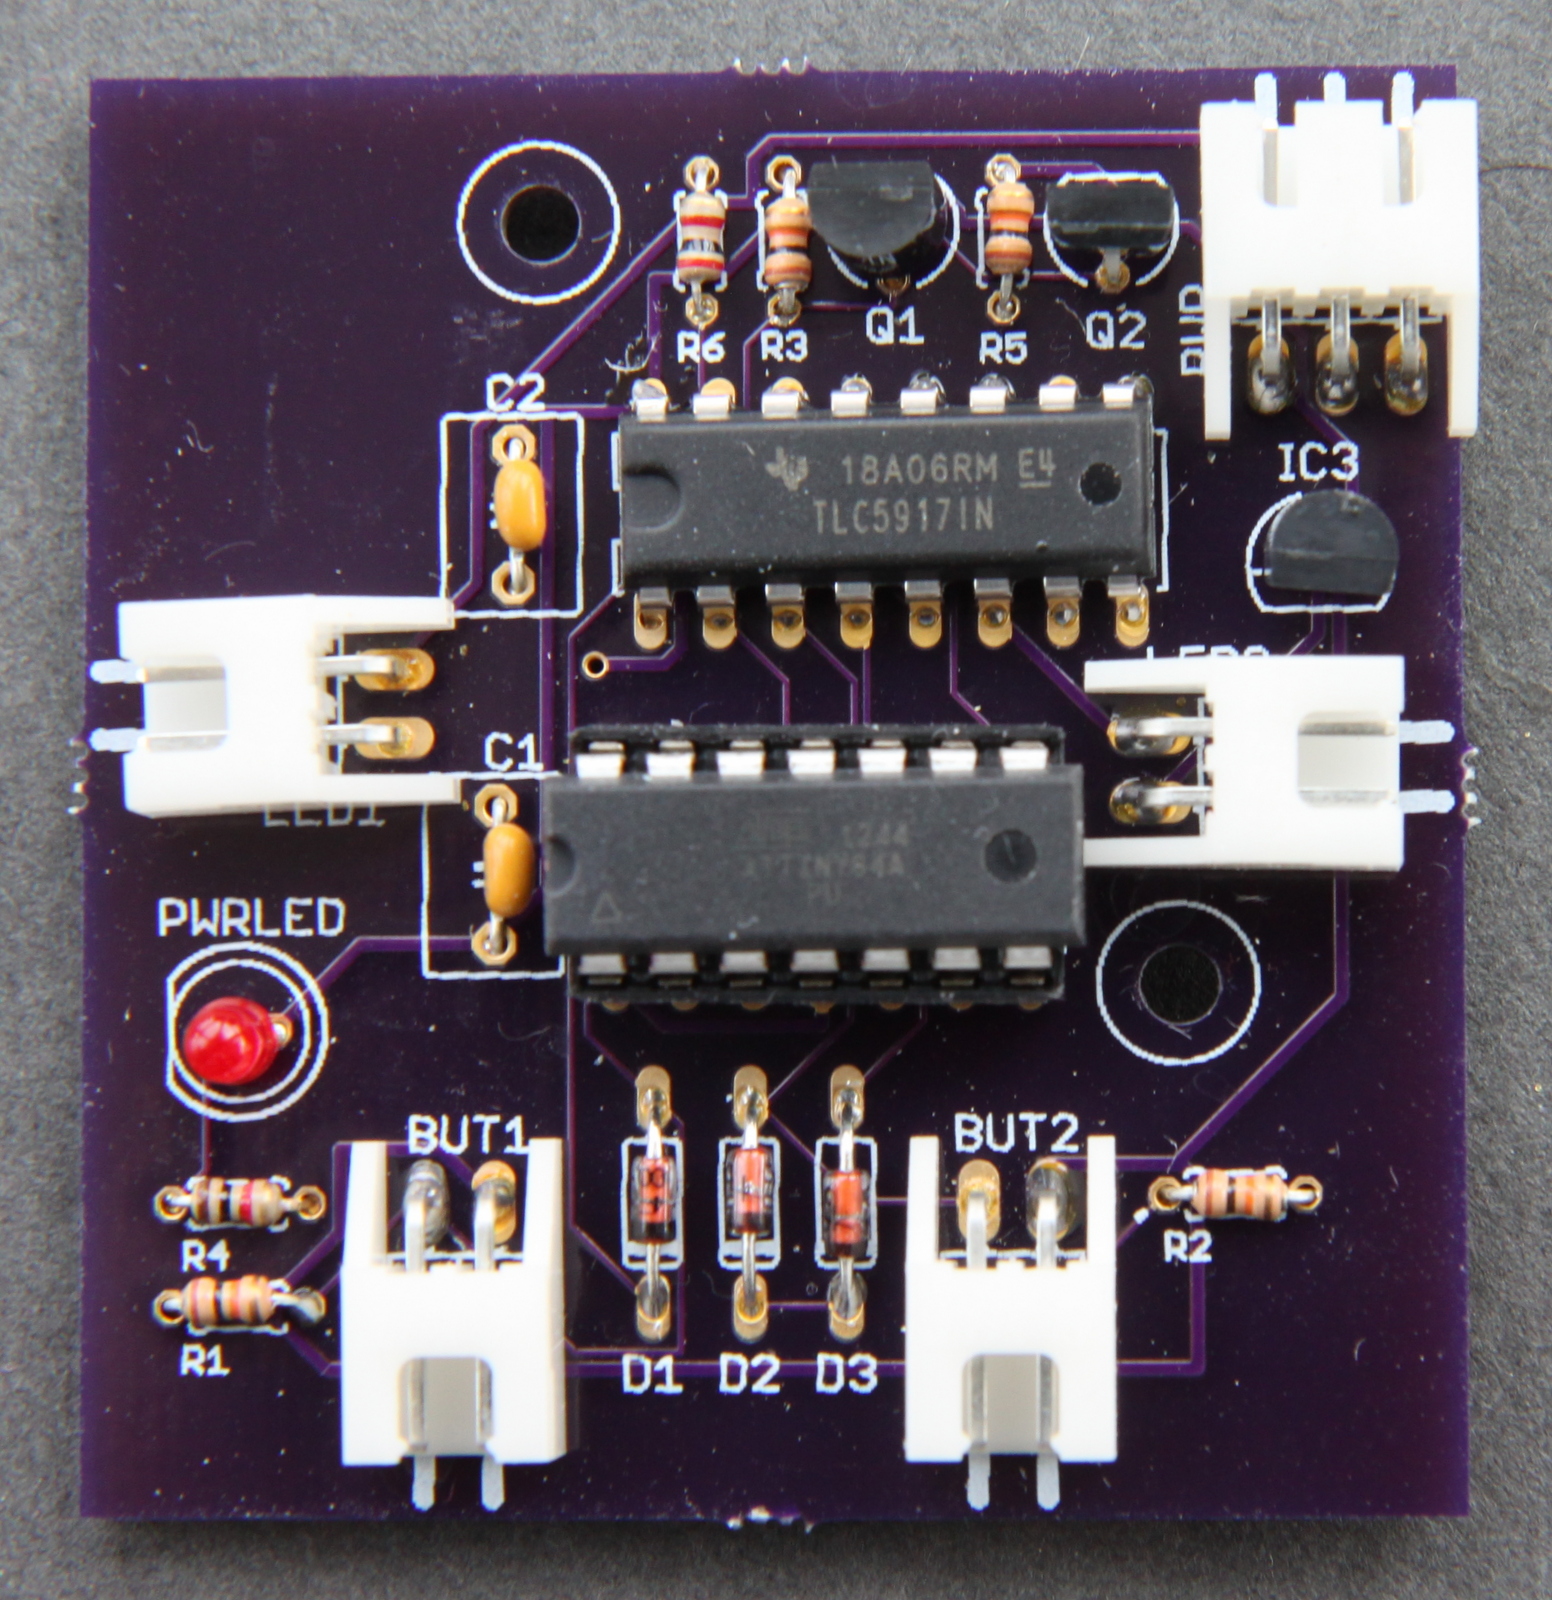
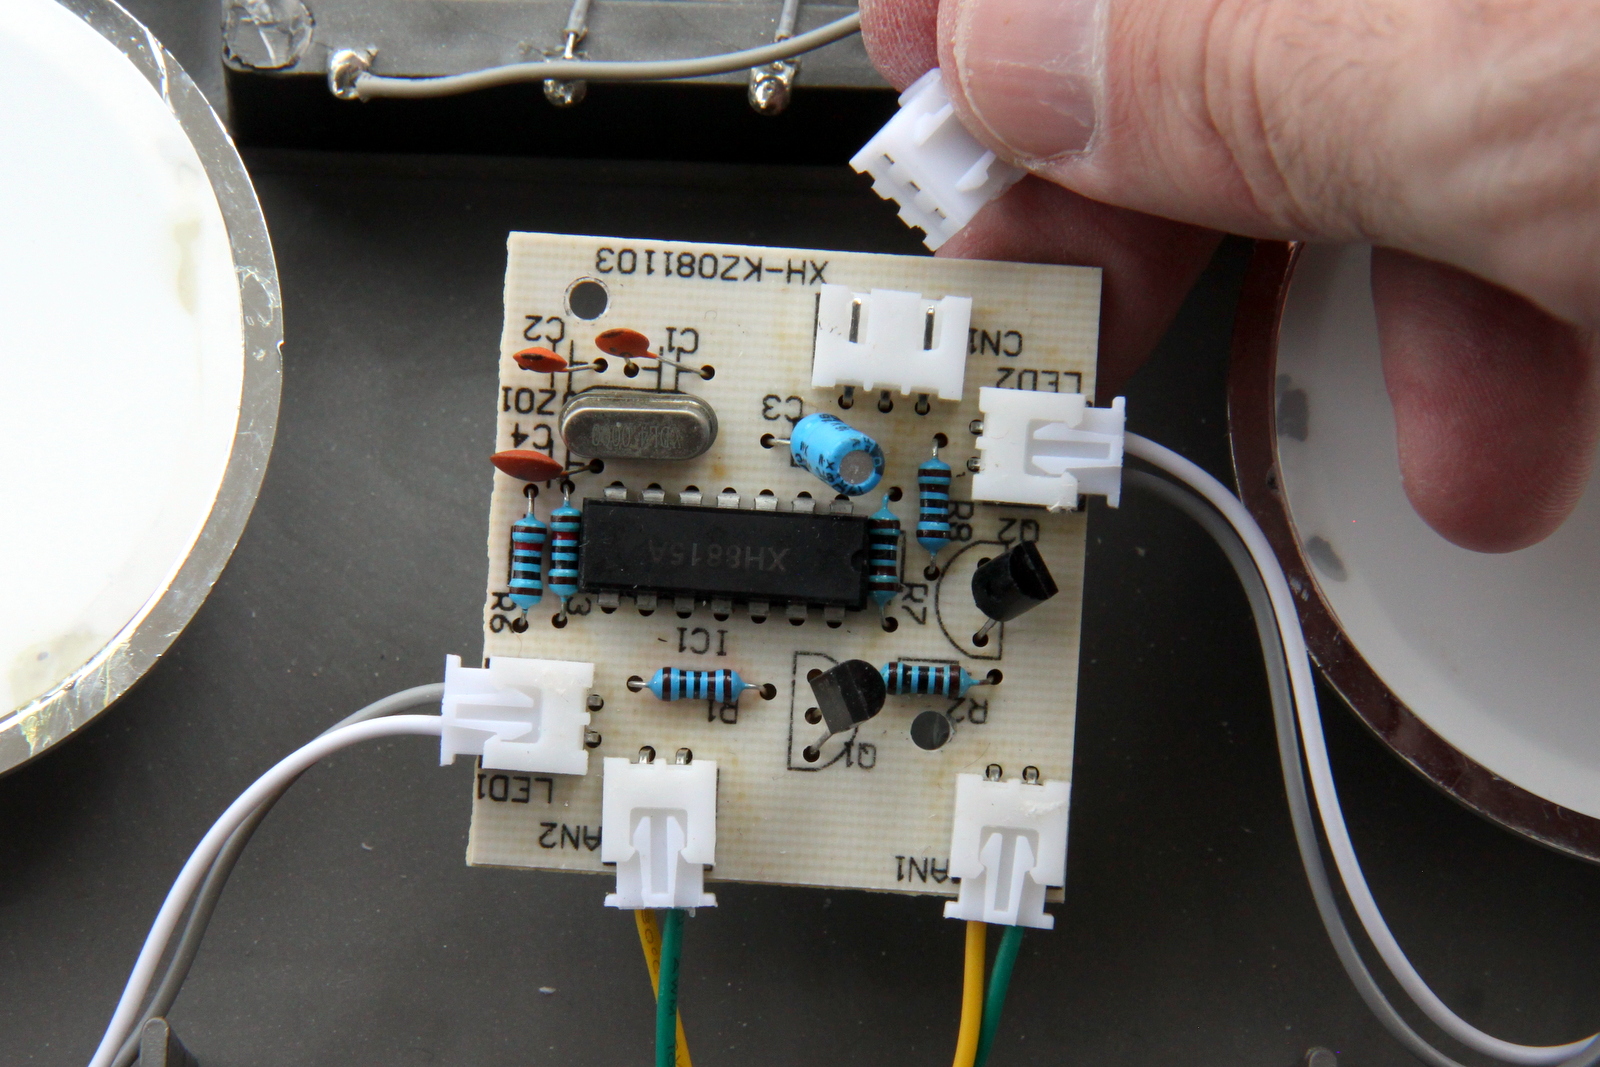
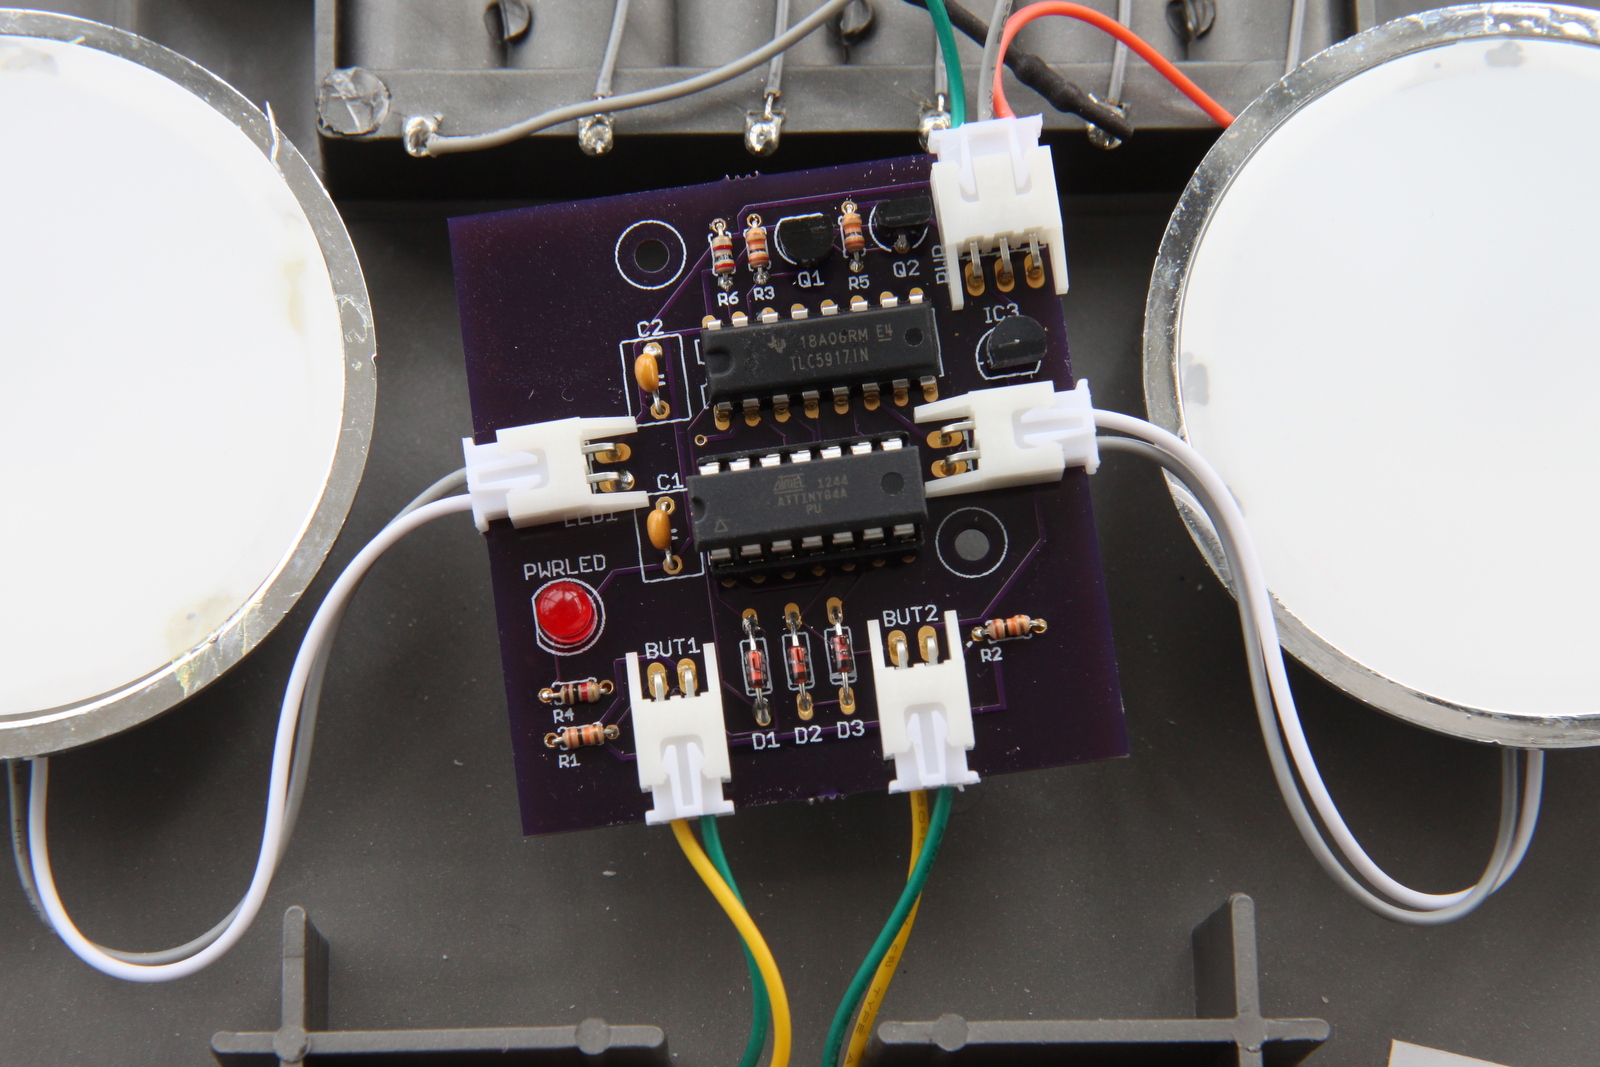
This is what your new
battery saver board looks like. There's a similar circuit board inside your
Duktig Stove. We'll be replacing it with this one. The prototype board pictured in this tutorial is purple, but yours is green. (They are functionally identical.) |
|
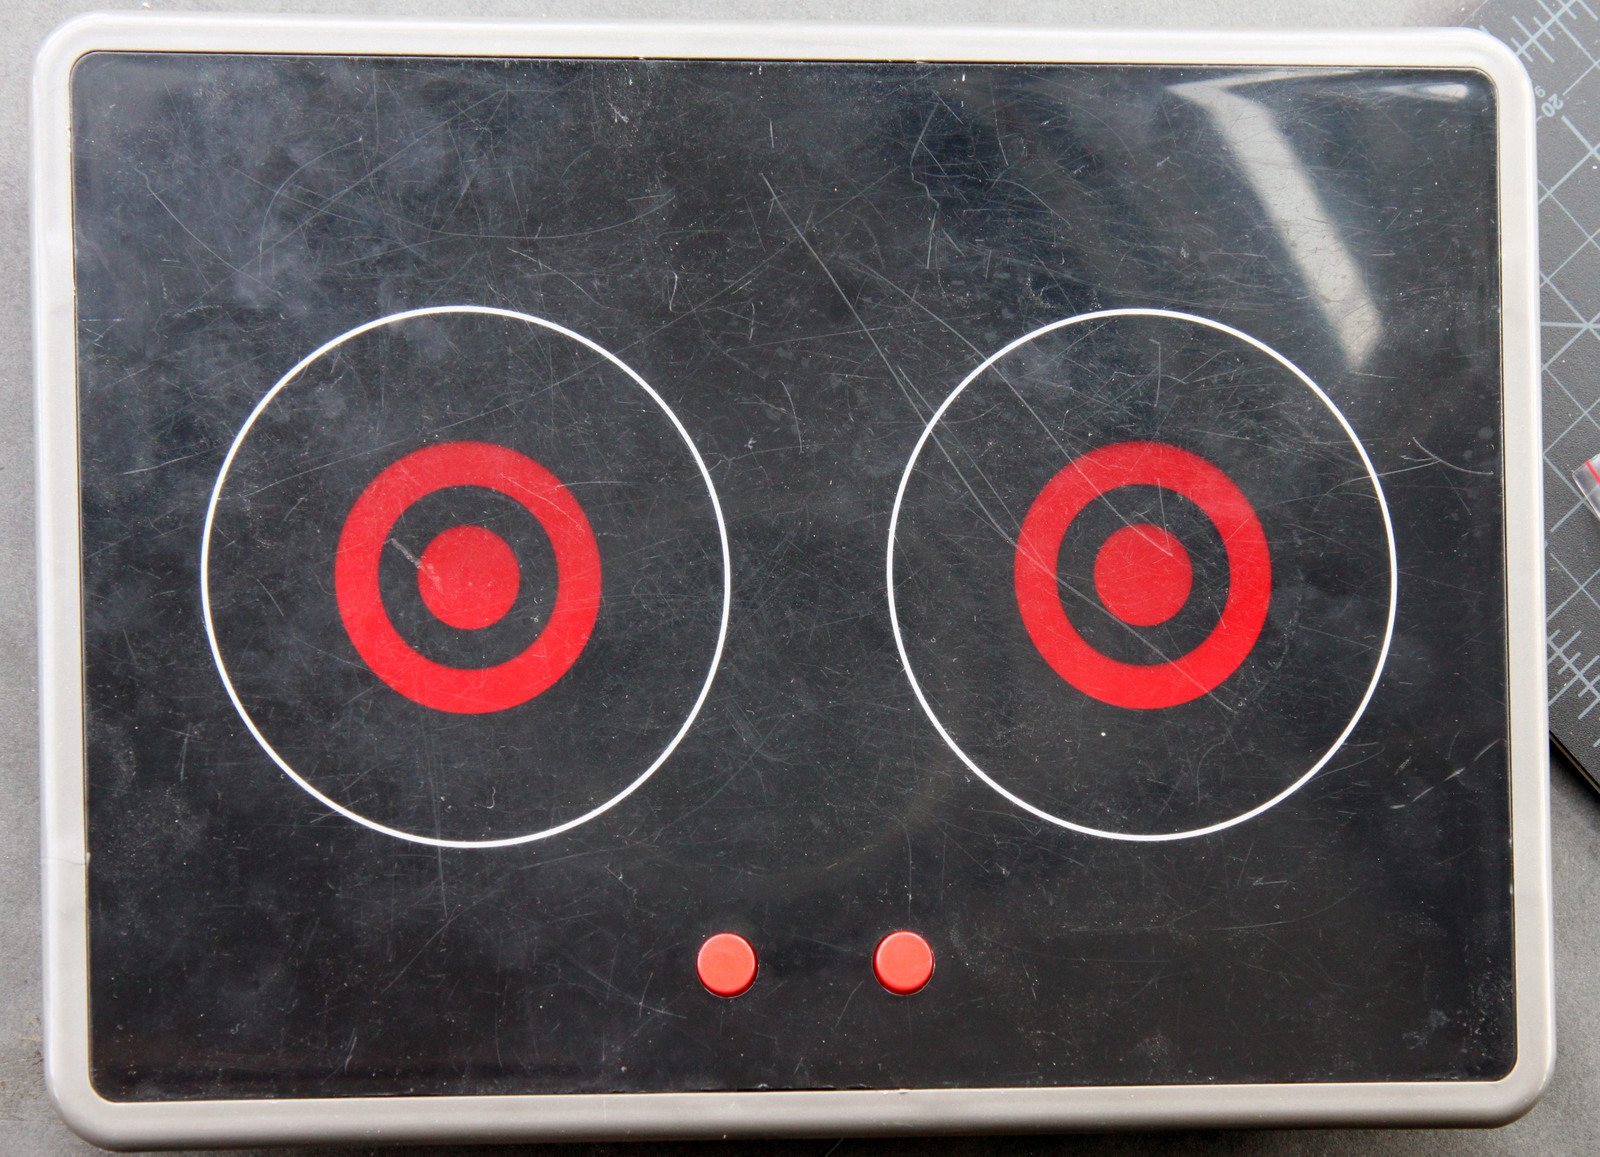
Here's your Duktig Stove. The hardest part is taking the plastic cover off and getting it back on. It's held in place by 8 plastic tabs (two on each side). |
|
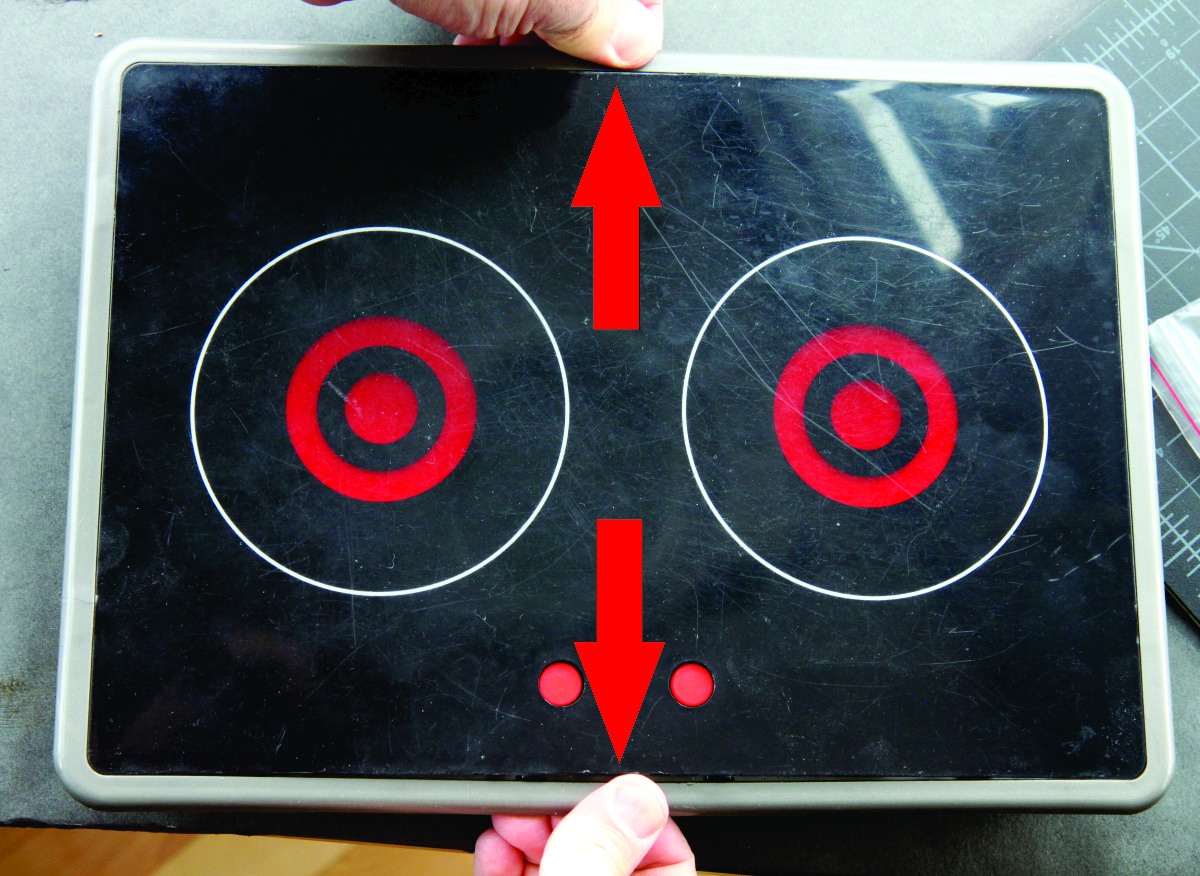
First, pull outward on the center of the long edges of the stove frame. With any luck, the top and bottom tabs should release as the plastic cover bows up slightly. If this doesn't happen, get a flathead screwdriver and carefully free the tabs as you're pulling outward on the frame. |

|
Carefully push in on the short edges of the plastic cover while pulling up on the center, further bowing the cover upwards until you can release one of the short edges. Remove the cover. |
|
Under the cover
you'll find the old circuit board we're replacing. Grab a Phillips head
screwdriver and remove the two screws holding the circuit board into
the stove's frame. For easiest installation, use a #2 Phillips screw driver for the battery compartment screw and a #1 Phillips screw driver for the circuit board screws, though you can get away with using a #1 or #2 for both purposes. (A #1 Phillips screw driver is usually included (along with a #0) as part of a "precision" or "jeweler's" screw driver set, e.g. Stanley 66-039 or 66-052). |
|
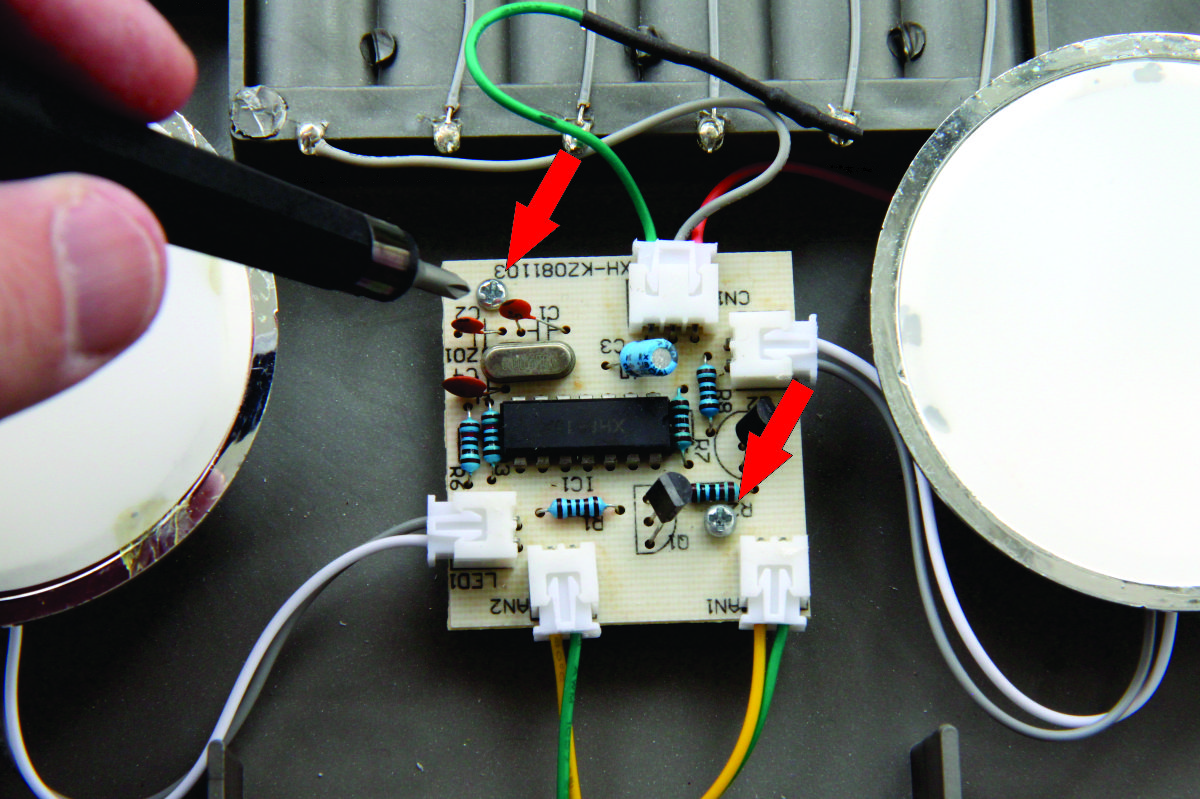
Disconnect the five cables that connect to the old circuit board. It may require some force. |

|
Connect the buttons' cables to the bottom connectors on the new board. Connect the left button to the left connector, and the right button to the right connector. Note: The old board crosses the left button to the right connector and vice-versa. Uncross them when attaching the new board. |
|
Connect the remaining cables</b>: the LEDs running from the "burners" and the power cable running to the battery box. |

|
Insert new batteries: the ones you had in the stove previously are probably dead. The old board eats batteries, even when the stove is off. |
|
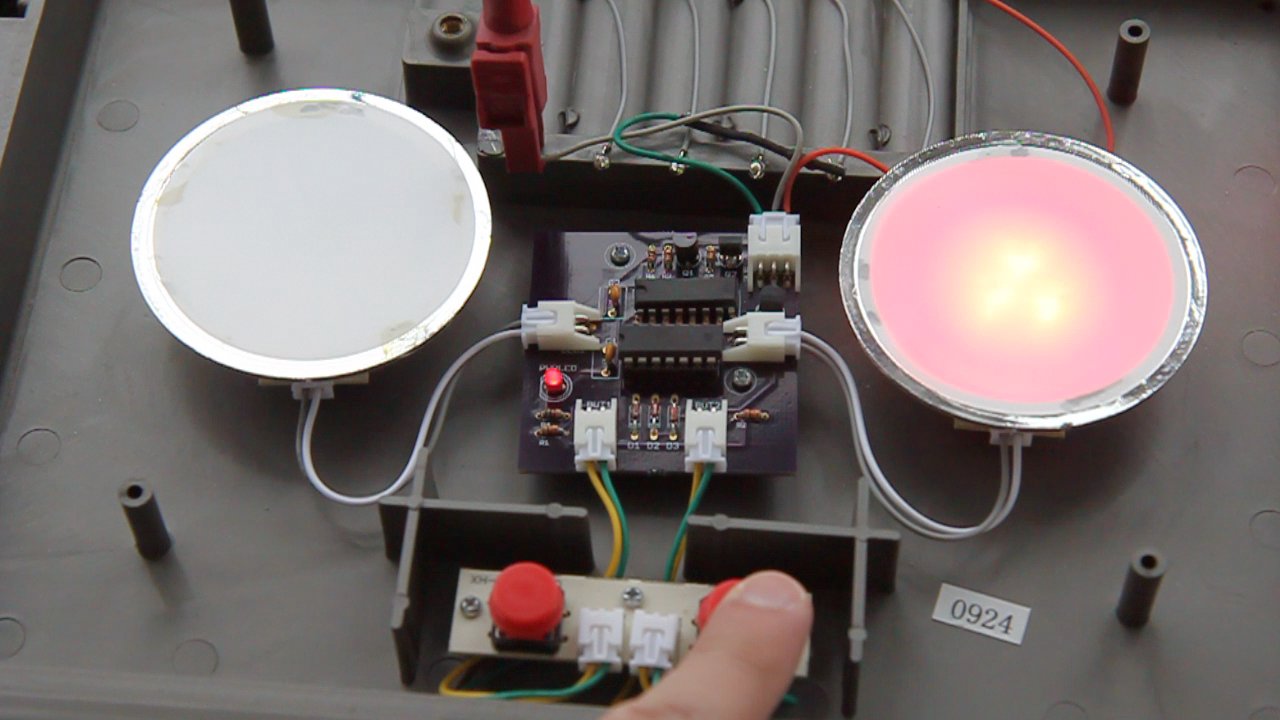
Test the
board -- make sure each button turns on the correct burner. If not, swap
the two button cables on the bottom side of the board. If you see the little
power LED go on, but not the burners, make sure the burner cables are
secure. If you see no activity at all, make sure all six batteries are inserted in the correct direction and the battery cable is secure. Make sure you're using new batteries; the batteries that were in the stove before are almost certainly dead. |
|
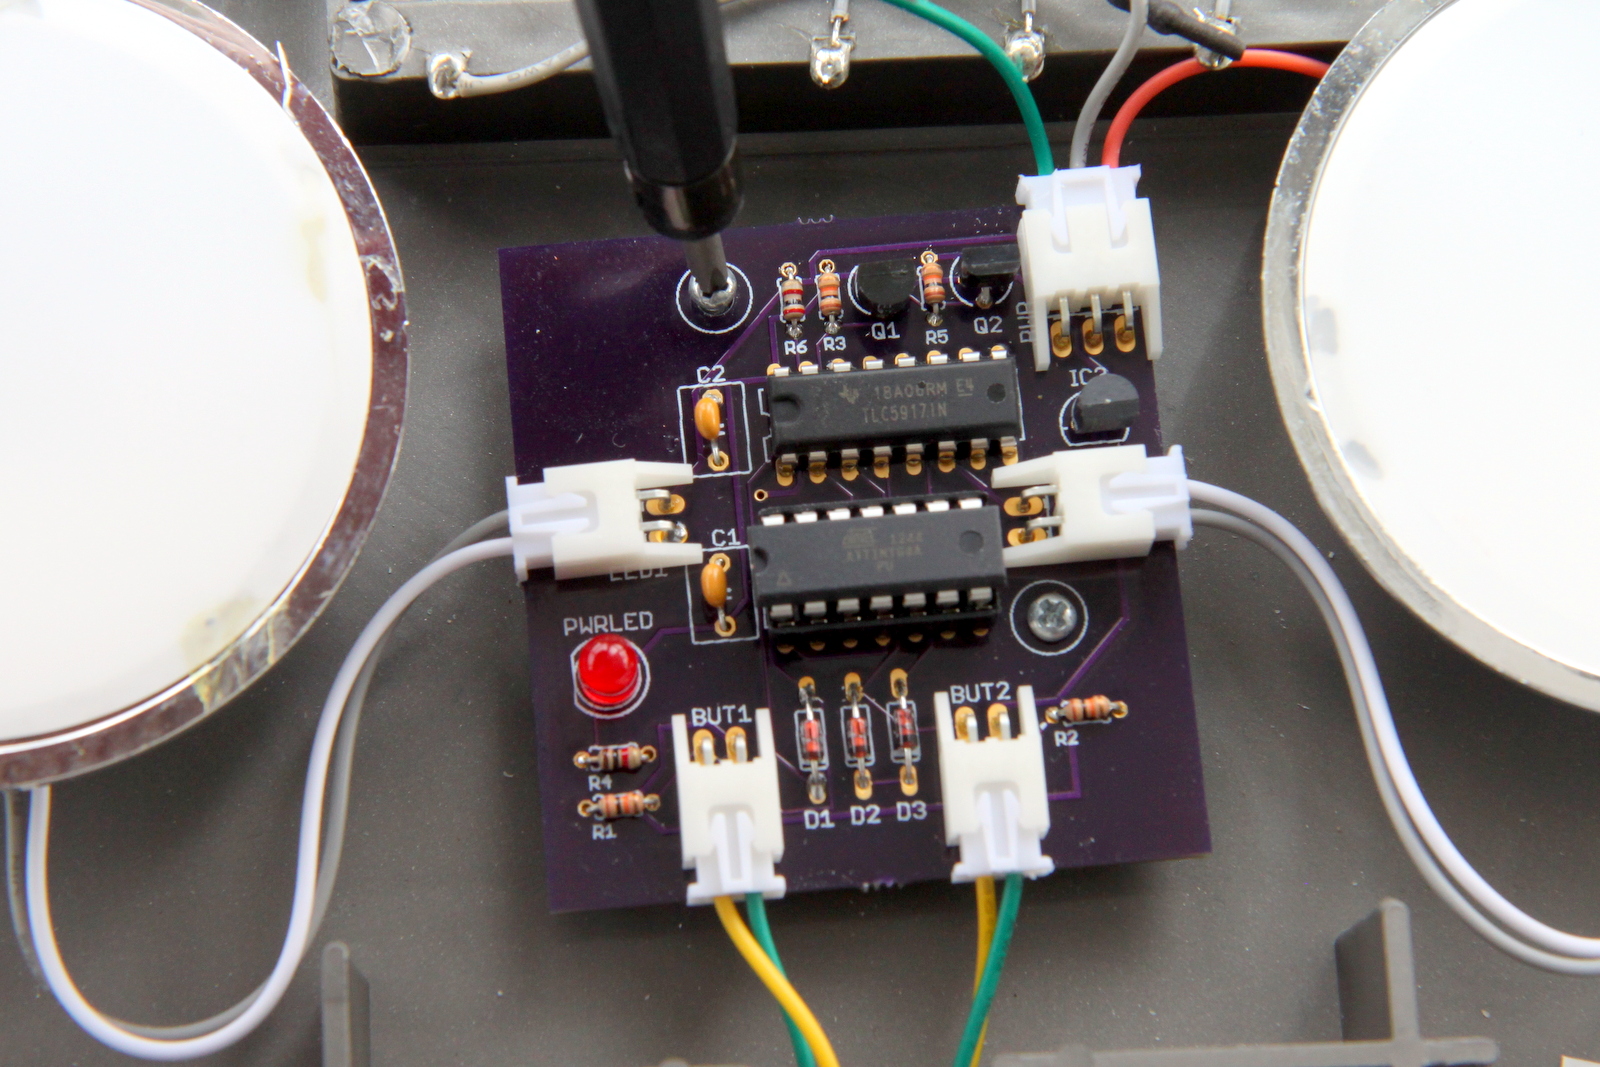
If everything works, replace the two screws that secure the control board to the bottom of the stove's frame. |

|
Get ready to replace the cover. Make sure the side with the thinner circle goes up. The cover is almost, but not quite, symmetrical. If you try to put it on upside-down, it will almost, but not quite, fit. |
|
|
Put one of the short ends in first. Bow the cover slightly and put the other short end in. Then pull the frame apart slightly to let the long-side tabs slip back into place. |
|
|
You're all done! You'll most likely never have to change your stove's batteries again. Enjoy! |